Monday 30 July 2012

Foundation Textures and Techniques


Foundation Textures and Tips

Hi Ladies,

I thought for my next blog I would hand out some tips of foundation techniques, from past experience working on Make Up Counters and visiting clients on a freelance basis the one thing that I got asked a lot was how to select the right foundation and how to apply. So I thought I would do a blog on giving out a few handy tips to you all.

It is important not to get stuck using the same makeup all year round as with the seasons changing so does your skin and it can be either dry or oily. A lot of ladies when selecting the colour of foundation, match it to the top of the hands or wrist, this is not correct. Please make sure the make up artist on the counters or yourself match the colour to the neck area. In summer the face can be a different colour to the neck as the sun has caught the face and not the neck. So it is best to match to the neck area and after you have applied your entire make up add bronzer to even out the skin.

The main point of a foundation is to even out the skin tone and colour of your skin. It can be a tricky business picking the right shade for your skin and also knowing what type of foundation is best suited to you, below is a list of all the different foundations you can purchase and next to each one I have written a short explanation of what they do.


Full Coverage – This one I am a huge fan off I love a full coverage but not so it is thick and you can see it on the skin, which is why I opt for Lancôme Teint Miracle (see my previous blog in more detail for this), A full coverage foundation will effectively cover blemishes, redness, scars and discoloration. A good full coverage foundation is Lancôme Teint Miracle RRP £29.00. With this foundation you can opt for a medium coverage or full, as it is build able. I know it is a little pricey but it lasts me for 5-6 months and is a fantastic product. And that is with me using it as a full coverage. Bare minerals are also fantastic for a full coverage look.

Oil Free – Fantastic for you ladies who are prone to oily skin. Oil free foundations will help keep shine away, this is done by the foundation creating a matte and textured finish to the skin. An oil free foundation will not contain any mineral oils or lanolin, these are the ingredients that cause clogged pores and can also cause sensitivity. A good oil free foundation is No7 Beautifully Matte Foundation RRP £13.50 this foundation balances oil production and minimises blemishes.

Sheer Coverage – A sheer coverage foundation will not provide you with a lot of cover, your skin will look more natural. This type of foundation will still even out your skin but will allow freckles and beauty marks to still show. The result of this foundation will be the effect of a make 
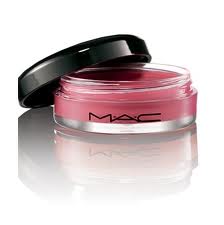
up free face. A good sheer coverage foundation is MAC Face and Body Foundation RRP 23.00

Moisturising – Great for dry to normal skin, as this provides extra hydration and also works well on mature skin. Again another good one for this is Lancôme Teint Miracle.

Illuminating – This type of foundation will give the skin a nice healthy glow and luminous finish. A good illuminating foundation is Bobbi Brown’ Award Winning Luminous Moisturizing Foundation RRP £30.00 this is fantastic for boosting the skin and firming the skin, this foundation also helps reverse the visible signs of aging and leaves the skin with a healthy glow – perfect.

Cream to Powder – These foundations normally comes in a compact, and once applied dry to a powder finish. These give a medium finish so great for providing more coverage, but not as much as a full coverage foundation. A good product for this is Benefit Play Sticks, RRP £23 - £26.00. A silky consistency, which provides a natural looking coverage.

Mousse – A mousse foundation will provide a matte or natural glow to the skin, the texture is very light and will feel really light on the skin. Maybelline do a good range of mousse foundations and No7 also do a fantastic mousse (Intelligent Balance Mousse Foundation), which is also great for oily skin this retails at £12.50

Tinted Moisturiser – A tinted moisturiser is great for a little coverage just enough to give the skin a little pick me up and a nice glow.  Tinted moisturisers are great to take on holiday instead of using a foundation. These also sink very easily into the skin. Benefit do a great tinted moisturiser called you rebel RRP £23.50 this also adds moisture to the skin.

BB Cream –Another product which I am a huge fan of, BB Creams provide more coverage than a tinted moisturiser but not as much as a foundation. They are lightweight and feel like silk on the skin. They cover blemishes, even out the skin and hide and uneven skin i.e. redness. A great one I have used on myself is Boots No7 BB Cream this is the only one on the market that caters to all three skin types. RRP 12.95.

Powder Based – This provides a non-reflective finish to the skin. A powder base can also be used on top of a liquid foundation to set it.  A good powder based foundation is Max Factor Crème Puff RRP 5.99.

So hopefully make up lovers with all the different foundations I have listed, this will make it a little easier for you to pick a foundation which is suited to you, your skin and what coverage you would like.

Below are a few of my tips on the application of foundation:

Before applying any foundation please make sure you cleanse, tone and moisturise. Please wait for your moisturiser to sink in until you apply your primer.

Apply primer, and again please wait a few minutes for this to work into the skin

Make sure you are applying your foundation in natural light

Apply small dots around your face, i.e. on the forehead, chin, cheeks and nose.

Apply your foundation in downward strokes to minimise pores, sweep over the ears and under the jaw line, none of us want that awful line do we J

Once the foundation is properly blended, if you require any more coverage add concealer instead of more foundation.

It is important to add a powder on top to set the foundation this also minimises shine.

A few ways to limit shine is to apply foundation with a brush or sponge instead of fingers and also use an oil free primer.

I really hope this helps with your foundation application and in selecting the correct foundation.

Any questions please feel free to message me

Sarah x


Friday 27 July 2012

Highlighting the Face & Body


Highlighting the Face and Body Techniques


Hi Make Up Lovers,

I have written below some great tips on highlighting the face and body, this helps contour and sculpt the face and really enhances your features. Highlighting products are used to reflect light, which in return adds definition and dimension to the face.

You have a whole range of highlighting textures to choose from these range from shimmer powders, liquids, gels and cream sticks. It can be quite confusing and daunting when you visit a make up counter as they have so many different names such as shimmers, iridescent, pearlized and illuminizers but don’t fret these all do the same thing. So you can now browse with confidence that you know they do the same job.

Ok so now I have explained a little about the textures and what highlighting adds to the face please find below some tips on were and how to apply these to your face and body.

This is a little trick I learnt at the Make Up School and I love this, by applying shimmer down the centre of the nose in a straight line creates the illusion of a smaller straighter nose – Genius don’t you think.J, for this you can use a eye shadow highlighter, or another product I have used before is the highlighter out of the Benefit 10 bronzer RRP 23.50 . But really any product that is a light shimmer will work for this.

This next one is a top favourite for me I do this every day and it looks gorgeous, so why not give it a go, Liquids or shimmer powders placed above the cheekbone really enhance your cheekbones and reflect light. So this needs to be placed right at the top of the cheekbone, apply this in a c shape so from the top of your cheekbone going just underneath the eye. A great product for this is MAC Cream Colour Base in Shell  RRP £14.50, I use this a lot on brides to be and you can apply this on top of powders and liquids. First apply your blusher or bronzer and the highlighter is always the last step. Again the Benefit 10 bronzer is amazing for this as the pallet is split into two half’s one a highlighter and the other a bronzer so great for highlighting and sculpting.  With this product you can kill two birds with one stone.

Highlighters can also be applied to the centre of the lips this creates the illusion of plumped fuller lips, I sometimes use an eye shadow highlighter for this it works perfectly. The one I use the most is the highlighter shade 1 out of the MUA Undressed palette, this palette is £4 so a great buy for all your highlighting shades plus darker tones.

Highlighters can also be applied to the body to create the illusion of longer more slender limbs; you can apply the highlighter down the centre of the shins, arms and collarbone. A great product for this is MAC Strobe cream RRP £12.50, this product is also great for highlighting the face, a great buy for my kit as it works in so many different ways.

I hope you give some of these tips a go they really do look amazing you will see the difference in your skin and dimension to your face immediately. I know some of the products are a little pricey but they are so worth the investment they last for so long and work on the skin like a dream.

Keep your eyes peeled for my next blog on Foundation Techniques this will also include more highlighting products, is there no end to what these products can do ;-), amazing.

x

Monday 23 July 2012

Ardell Duralash Individual Lashes


Ardell Duralash Naturals – Individual Lashes

Hi Ladies,

Over the weekend I used some of my Ardell Individual False Lashes, I use these a lot on Brides to be as they provide a natural full lash look. As bridal make up is more natural I tend to stick to individual lashes rather than strip lashes as these can look a bit much on a bride.

You can purchase Ardell Individual Lashes on Ebay, the prices are fantastic I get x1 pack for £3.29 or you can buy 3 packs for £10. For us Make Up Artists it is sometimes best to buy in bulk so we have a supply in our kits.

You can buy a pack with just short, medium or long lashes in or a pack with a mixture in. I tend to buy a mixture of the lashes, I use more of the medium length but I do like to use the longer lashes on the outer eye are area.

These can be fiddly little things to apply; a steady hand is always a good thing to have when applying these. J

Below are my top tips on applying individual lashes:

  • Always curl your eyelashes first
  • Apply one coat of mascara first, some people don’t do this but I find it helps with the blending of the individual lashes.
  • Try and gage the length of your own lashes and pick the most suitable length from the pack. If you have short lashes and apply the longer ones it will not look right. As you can see from my picture I have medium length lashes so I used medium individual lashes and put two longer ones on the outer eye area to provide the fluttering effect. Yet still natural. I also used x2 shorter length individual lashes coming in towards the inner eye area. If you have short lashes then the medium length individual lashes will be just fine for the outer eye area.  Just go one length longer for the outer eye area.
  • Apply the lashes as close to your natural lashes as you can, I apply them sitting in between the lashes so instead of them sticking to the lash line they stick right into the root area. You can use as many lashes as you like, I like to use quite a few so they look full.
  • Once you have applied all the necessary lashes apply x2 coats of mascara, again this will really blend the lashes into one another. And really make your eyes pop.
  • I used L’Oreal Mega Volume Mascara in Black, and to apply the lashes I use Duralash Glue from Ebay, this comes out white but dries clear – A godsend.
  • And lastly, I apply a line of gel liner across my lash line just to cover were the lashes have been stuck (if they are visible) and mostly to provide some definition. I use Fashionista Gel Liner or MAC Fluid Line for this.

Hope this helps for when you next apply your lashes x

Friday 20 July 2012

Herb Ritts Inpsired Photo Shoot

This was my latest photo shoot, the Make Up was kept to a minimum for this one which I struggled with a bit as my creative flare always comes out when I get my make up out for a photo shoot, but I love these images they are very elegant, it is also best to have a good range of images in you portfolio to show prospective employers that your skill set is broad.

I used a mix of MAC Nude Shadows and a light gloss on the lips abd MAC Face & Body Foundation mixed in with MAC Strobe Cream.

I have just two pictures from this shoot please do see below:


6 Days to go Ladies - Olympic Themed Make Up Competition

head over to my facebook page at www.facebook.com/sebmakeupartist

Winner receives a fantastic Goody Box full of lovely Make Up Products

All entry details and picture of the prize are pinned to the top of my page

You will not be disappointed, Good Luck x

Thursday 19 July 2012

Colour Bomb Photo Shoot

Color Bomb Editorial Photo Shoot

I wanted to share these lovely images with you all.  I love the images from this photo shoot, this was shot by Daniel Sannwald for V Spain Magazine, this shoot portrays Fluorescent and pastels colours. A big favourite of mine. Pastel colours can look so effective and are great for adding texture.


Blusher Shades for each skin tone

I always feel so much more awake with a pop of colour on my cheeks, it always brighhtens up my face. So remember ladies to add that pop of colour to your daily routine. For fair skin - opt for light pinks For olive skin tones - go for soft corals and peaches For medium olive skin tones - choose deep golden pinks and warm orange's For darker skin tones - go for deep plums and hot fuchsia With all this choice of colours for your cheeks you are sure to look vibrant and glowing. :-) X

Tuesday 17 July 2012

MAC Mineralize Volcanic Ash Exfoliator - A little bit of luxury


MAC Mineralize Volcanic Ash Exfoliator – A little bit of Luxury

WOW – Another great product I have managed to get my hands on recently. I popped into MAC last week and was looking at all the lovely Make Up, obviously trying not to spend much money ;-). The nice MAC Artist came over to speak to me, we got chatting about the new Heavenly Creature Collection (which I have previously blogged on), and she offered me a free sample of the MAC Mineralize Volcanic Ash Exfoliator. Which of course I said yes to instantly.

I used this for the first time a few days ago and I was very impressed. It has small sugar crystals mixed in with the natural Volcanic Ash (please see picture) which on the skin feels really soft, (I know from using other products some grains can feel really ruff on the skin). I also found that the more I cleansed it into my skin the crystals disappeared to leave my skin feeling super soft. 


I left this on my skin for a couple of minutes to let it work in, then rinsed it off with warm water. This product is best used once or twice a week to refine and unclog the skin. The Volcanic Ash also adds instant moisture to the skin; you can use this product on the face or body.

This product is only in stores for a limited period, so if you fancy a little bit of luxury I would highly recommend this product. P.S It also smells amazing. :-)

You can purchase at a MAC Counter or online at various department stores.

RRP £21.00

x

Monday 16 July 2012

Make Up Academy - Amazing Undressed Palette


New Undressed Palette By The Amazing Make Up Academy

I have had this palette for a few weeks now and I have used it quite a lot, this palette follows the huge success of MUA previous palette Heaven and Earth.

This palette is all about opting for that fresh faced look, to go hand in hand with this seasons must have Make Up look which is the fresh/bare faced look. But with this palette you can turn this look into a smouldering nighttime look instantly. Which I am a big fan of, you can not beat a gorgeous smouldering smoky eye.

The palette has 12 gorgeous shades to suit any skin tone, and any occasion.

My Favourite shades are the highlighters, they are stunning. I use Shade 1 for under my brow arch, the inner corner of my eye and also bringing the highlighter down near to the tear duct area, applying to these areas really brightens up the eye area. I love a highlighter under my brow; I do not think I can go a day without applying to this area ;-). Hence me now hardly having any shade 1 left. ;-)

Shades 1, 2 and 3 are great for highlighting.

Shades 6, 7, 8 and 10 will give you a really sexy smoky eye. Shades 11 and 12 are much darker so you can turn your daytime look into a nighttime look with minimal effort. You can blend these colours over the top of the look you have already done.

I do have the Heaven and Earth palette, I have used that today but I have to say I do prefer this palette the shades are much warmer and again the highlighter shades have won me over. You can’t beat a good highlighter to brighten up certain areas of your face; it really does make a difference.

This palette is very very silimar to the Urban Decay Naked Palette, the shades are very similar, but MUA is at a fraction of the cost at only £4 and the pigment in this palette is amazing. I have used this palette on quite a few brides now, it worked a treat :-)

MUA also have the new Going for Gold Olympic Inspired Palette out at the moment for you to get your hands on, you can WIN this palette on my Make Up Page by entering my Olympic Themed Make Up Competiton.

Head over to www.muastore.co.uk to check out MUA'S maaizng product range. You will not be disappointed.

Have fun x

Friday 13 July 2012

Illamasqua Sealing Gel - Genius


Magic!!!!!! Would you like to know how to turn your eye shadows into eyeliners????

 Plus eyeliner that stays put until you take it off. No melting off or smudging.

I recently purchased a little gem called Illamasqua Sealing Gel. Please see below for the instructions.

I have had the time recently to test it out with some eye shadows. I have found it works best with Illamasqua Eye shadows, but it still does work with other brands. I found it mixed better with the Illamasqua products.

Some people dab the brush into the sealing gel and then pop the brush onto the product, personally I didn’t like the way that worked (that is just my preference it works well for other people) so instead I got a small palette and a spatula and took some of the product from its packaging and popped it into the pallet. I then squeezed two small drops of the Illamasqua Sealing Gel into the pallet and mixed it together with a brush or you can use a cotton bud. This way is a tad more time consuming but the results are much better.


Surprise there you have it, a nice vibrant eyeliner, which was once an eye shadow – Brilliant.

The picture I have done here is using Illamasqua’s powder shadow in shade Permission. Ok its not a colour that you would wear day to day, but it shows well that it works as eyeliner. Looking at that picture I cannot believe it use to be an eye shadow.

And you can also see form the picture I have swatches of each of the Illamasqua eye shadows I have, I wanted to show you all just how vibrant the colours look using the sealing gel.

Not only does this transform eye shadows into eyeliners but you can also transform Pure Pigment, Eye Brow Cake Or Eye Liner Cake (already an eyeliner but with the sealing gel it is locked in for longer) and use across the face or body.

As Illamasqua quoted “Be Bold, be original and stand out from the crowd”

You can purchase the Sealing Gel from www.illamasqua.com at a price of £10.50. The box includes two small bottles.

Thursday 12 July 2012

Make Up Academy - Amazing Face Primer

Ladies, Want flawless skin? Want a budget primer that gives you top results??

Then have a read of my blog post below on Make Up Academy’s Amazing Face Primer

Have you ladies ever wandered why your foundation does not stay on very long?? You apply your foundation in the morning to find by lunchtime it has gone patchy or seems to be sliding off. Hummm I am 100% sure we would all like to avoid this

Make Up Academy’s Primer is fantastic; apply this after your moisturiser (please do wait for your moisturiser to soak in first). Then apply the Primer all over your face, I normally apply this to the cheeks forehead, chin and nose, so pretty much everywhere were you apply your Foundation.

Again wait for the Primer to soak in before you apply your Foundation, if you do not wait for those few minutes, the primer will not have time to work into the skin and do its job properly.

Final Step apply your foundation evenly over your skin, you will find the texture of your skin is much softer, more even and the appearance of pores reduced.

I used this today and as soon as I applied it to my skin my skin appeared brighter and my redness went down a lot. As soon as I applied my Foundation I could tell instantly that it was sinking into my skin a lot better, which made my foundation much easier to apply.

I have tried quite a few primers and this is one of the best ones, and at such a great price.

The BEST part of this the Primer is ONLY £4.00 what a BARGAIN.

Head over to www.muastore.co.uk for perfect flawless skin.

x

Alex Box and Rankin Image - Exquisite


This is another image by the very talented Alex Box, this image is featured in the Alex Box and Rankin Book.

This is one of my favourite images, what I like about Alex’s work is that it is very distinctive and you do not see anything like it anywere else. It is very special.

She certainly has a very very special gift.

You can purchase this amazing book by Alex Box and Rankin at selected online websies, the book has gone down in price to £32-£38, whish was originally over £100. A great book for the coffee table

x

New Blog Post Coming Soon - Illamasqua

I will be posting a Illamasqua blog up in the next two days, keep your eyes peeled it is going to be a colourful one :-) Sarah x

Wednesday 11 July 2012

Amazing Olympic Inspired Make Up Competition


The time has finally arrived ladies do you have your brushes ready?

 I know some of you have been as excited as me about this competition. I could not wait to reveal it to you.

So I can reveal the theme for this months Competition is based on the Olympic Games 2012. It is not long now until the opening ceremony so what better way to get involved than to get creative with some Olympic inspired make up looks.

The Prize for this has been attached (please see picture). Included in this Make Up Goody box is as follows:

Make Up Academy’s Brand New Olympic Themed Eye shadow Palette – Going for Gold, this comes packed with gold’s, silvers, grey’s and bronze shades. Perfect for experimenting with new colours. I have to say I have not seen a palette with these shades in the shops before.

Make Up Academy – Blusher in Shade 1. I wear this all the time it is a gorgeous pink colour.

Make Up Academy – Mascara in Black

Fashionista Secret Gel Liner – Shade Short List, this is a Charcoal shade, which is nearly Black. I use this on photo shoots and it is amazing, it stays on all day and does not smudge. The brush is hidden in the lid. It is also very easy to apply.

No17 – Wild Metallic Cream Eye shadow, in shade Wild Bronze. I picked this, as Metallics are huge at the moment. You can apply with your fingers or a brush for a fierce smoky eye.

Please see below for the entry details:

Please choose a country’s flag of your choice that are competing in the Olympic Games this year.

With your chosen flag colours please create a eye design, this can be anything you wish whether it be something really bold and creative, or if you wish you can design a eye look for a night out, so maybe a nice smoky eye with your chosen colours. But the good thing is the look is completely up to you. So have fun with it.

Be as creative, bold, vibrant and imaginative as you wish.

The competition will close on Wednesday 25th July at 9pm. Please e-mail me your entries to sbaldwinmakeup@gmail.com or you can private message me on my Make Up Page at www.facebook.com/SEBmakeupartist

Please note – your entries will not be posted on my Make Up page on Facebook.

Good Luck Ladies, have fun. xx

Monday 9 July 2012

Prada AW12 Optical Design


I came across Prada’s new collection for AW12 whilst I was flicking through my new Issue of Vogue Magazine. The fashion designers want the optical design to be worn head to toe, and they state it is a look best worn out in Sharp Suits and tailored coats.

Ok the optical design is very out there and loud, so to go with that the Make Up has to be loud and out there. This caught my eye instantly and it matched the outfits perfectly. I love the orange, black and purple combination, with the brows blocked out. Very effective.

I can see a recreation of this look coming up on my Blog soon :-)

x

Saturday 7 July 2012

Beach Make Up - Be a Beach Babe


Beach Make Up – Be a  Beach Babe


So ladies, I know we are all fed up of this gloomy British weather, so maybe we all need some nice summer products to perk up our day.

Below is a checklist of the essentials we all like to take away with us, most of them are all ticked off but we have one section, which we may need a little assistance with :-)

Check List:

Summer Holiday Booked – Check

Clothing – Check

Accessories – Check

Footwear – Check

Make Up & Beauty Products – ? This is were I come in Ladies, with my top picks of the best Make Up and Beauty Products to take away on your summer holidays you are sure to look nothing less than perfect.


My Top Pick for the Eyes, if you choose to wear a Mascara on holiday always make sure you purchase a Waterproof one, below are two great Mascara’s perfect for the Beach.

Splurge – Clinique Lash Power Mascara Long Wearing Formula, this Mascara was voted Winner of the Look Magazine for the Best Waterproof Mascara. This Mascara lasts through rain, sweat and humidity so perfect for a holiday. RRP £16.00


Save – Maxfactor Masterpiece Waterproof Mascara, defines and separates lashes. The high tech IFX brush really helps with those hard to reach lashes in the corner of the eyes. RRP £8.99


My Top Pick for the Lips, for the lips I would recommend a product that provides moisturising care, a SPF and provides a lovely sheer wash of colour. Below are my two favourites.

Splurge – MAC Tinted Lip Conditioner SPF 15, this Balm provides colour, conditions lips, and locks in moisture (perfect) It also contains Oil, Shea Butter, Avocado Extract and Vitamins A and E. RRP £11.00. Available in three different shades.


Save – Nivea Pearly Shine SPF10, I have to say most of the time I opt for this product it provides long lasting Moisturisation along with a gorgeous pearly shine which leaves your lips silky smooth. Protects against UVA and UVB rays. RRP £2.29


My top Picks for the Face – Even if I am sunbathing I do like a little something on my face (not to much mind you) something just to give my skin some warmth until my tan appears ;-), once my tan arrives I still opt for bronzer or Blusher, a perfect flush on the cheeks is essential. Below are my two top picks for the face.

Splurge – MAC Mineralize Blush in Solar Ray, A mineral based blusher creates the look of a blush from within the skin instead of it looking like it sits on top of the skin, this MAC Blusher is perfect for those lazy summer days RRP 19.00


Save – Make Up Academy Mosaic Bronzer, I just love MUA products they are amazing for the price tag. This Bronzer is amazing it comes in two different shades one with pink undertones, this is best suited to medium skin tones and ladies with blonde hair, whilst the more golden undertones is suited to brunettes. Each compact contains four different shades so when your brush is swirled around you achieve a multi-tonal look, which will bring out the natural tone for your skin. At the moment these are 2 for £4.00 at www.muastore.co.uk


Tip - When applying bronzer the trick is to start with a little amount this way you can build up your desired colour. Apply to where the light naturally hits your face so i.e. your cheekbones, your forehead, chin and the bridge of your nose. Result a perfect sun kissed bronzed face – Beautiful.

My Top Picks for the Body – I have found I do love a good sunscreen, which incorporates a touch of shimmer to it; this gives your skin that gorgeous glistening look whilst sunning yourself. Below are my two picks for you:

Splurge – Dior Bronze Beautifying Sun care for the Body SPF30, This gorgeous shimmering formula contains an exclusive Tan-Protect complex to provide the best protection resulting in a more intense longer lasting tan. RRP £31 - £35 depending on stockists


Save – Hawaiian Tropic Shimmer Effect Lotion SPF40, this lotion is water resistant for 80 minutes, protects against UVA & UVB, includes mica minerals and leaves your skin enhanced and highlighted. RRP £11.19


If you have a holiday coming up soon why not take advantage of my beach make up and beauty best picks,  you will soon be a Beautiful Bronzed Goddess. Please feel free to ask me any questions, I will be happy to help.

Have Fun in the Sun xx


Wednesday 4 July 2012

MAC Heavenly Creature New Collection


MAC Heavenly Creature Colour Collection

MAC have brought out an amazing new collection called Heavenly Creature. MAC are constantly amazing there fans with new and exciting make up ranges and this one will definitely not fail to impress it’s fans.

The collections colours are based on the universe, the mineral make up products have a mix of eye-catching colours merged into its palette that will give the skin a boast of radiance. The lightweight texture results in the skin receiving the perfect amount of colour.

This collection is perfect for the summer period. The strong colourful pigments are perfect for transforming you into a Heavenly Creature.

The New Collection consists of:

4 Mineralize Skin finish £21.50 – great for highlighting the cheeks and brows and anywhere on the body. Gives the skin an amazing polished look

 Centre of the Universe
 Earthshine
 Starwonder - Amazing colour
 Lightyear


4 Mineralize Blushes £19.00 – Baked minerals refined in to a powder formula, provides sheer and lightweight application. The formula provides layer upon layer without to much coverage. Fantastic for a pearlized look.

 Ring of Saturn
 Soalr Ray
 Stratus
 Supernova - I love this colour


5 Lipsticks £13.50 - Five textured Lipsticks in shades Fire Sign, Venus, Caper, Pleasureseeker and Cusp of Dawn

5 Crème sheen Glass £16.50 – A product that infuses MAC’S Crème sheen Lipstick with the shine of MAC’S Lip glass. The result a soft non-sticky gorgeous lipcolour 


Enjoy x

Sugarpill Cosmetics - WOW


Wow I have found myself a new Site to get Inspiration from. Sugarpill Cosmetics what a colourful vibrant brand and the Make Up is very creative.

A lot of you have probably seen this site before, as a newbie I had to share this picture with you all

Check out there page at http://www.sugarpillshop.com/

MAC Fluidline Longwearing Gel Liner


MAC Fluidline Liner (Gel Formula)  -  Longwearing

MAC’S Fluidline Liner really is a fantastic product. I use this a lot on brides to be and photo shoots. As it glides on so easily and dry’s instantly so working quick with this product would be an advantage to do.

It is longwearing and smudge proof so once its on its on for a good length of time, again which is why I use this on Bride’s to be.

Here I have created a small flick on myself and I have used Shade Dipdown. Which is a rich brown shade.

Use a brush to apply, one like I have pictured here is perfect it is a Flat Line Brush (synthetic) so ideal for liquid or gel liners. I smoother the whole tip in the product and glide it across the top of the eyelid really close to the lash line. You can have the link as thick or thin as you wish depending on what look you are going for.

Tip, Do not pull the skin were you would like to draw in your flick this distorts the skin and you will not get even flicks. :-)

RRP £14.00

MAC Fluidline comes in 6 shades.

Rich Ground
Dipdown
Blitz and Glitz
Blacktrack
Waveline
Macroviolet

Monday 2 July 2012

Amazing Sigma Make Up Brushes


WOW I saw these brushes and had to share them, I am in love. They are amazing. Nice and girly colours and great quality brushes by Sigma.

All made form synthetic. There are 12 brushes in this fabulous kit. The Brush Holder splits into two so you can be very organised on a job by having your dirty brushes in one pot and your clean brushes in another. Result :-)


Brushes Included:

E05 - Eye Liner: Create smooth and even lines. Use with gel or liquid liners.
E30 - Pencil: Soften and smoke out lines. Soften pencil liners along the top and bottom lash lines, add shadow to line the eyes, or use to highlight inner corner of eyes.
E40 - Tapered Blending: Soft blended crease. Using just the tips to apply color, sweep back and forth through the crease for a diffused and blended finish.
E55 - Eye Shading: Even application of color. Place color across the whole lid for an even and strong application of product.
E60 - Large Shader: Uniformly cover the whole lid with product. Apply cream shadow base or cream shadow for quick and even coverage.
E65 - Small Angle: Create precise lining. Moves fluidly and easily across the upper and lower lash lines. Use with gel, cream or powder liners.
E70 - Medium Angled Shading: Soft application of color. Use for brow highlighting or to blend the crease.
F30 - Large Powder: Even powder application. Uniform blending of powder products onto the face and body.
F40 - Large Angled Contour: Subtle cheek application. Use the angle to softly contour the cheekbone. Can also be used to apply blush.
F50 - Duo Fibre: Creates an airbrush effect onto the skin. Can be used with powder, liquid or cream products.
F60 - Foundation: Smooth foundation application. Apply liquid or cream products such as foundation and primer.
F70 - Concealer: Conceal small areas. Conceal the hardest to reach areas such as around the nose and eyes.